How to make Water Bubble or Aquarium Nails


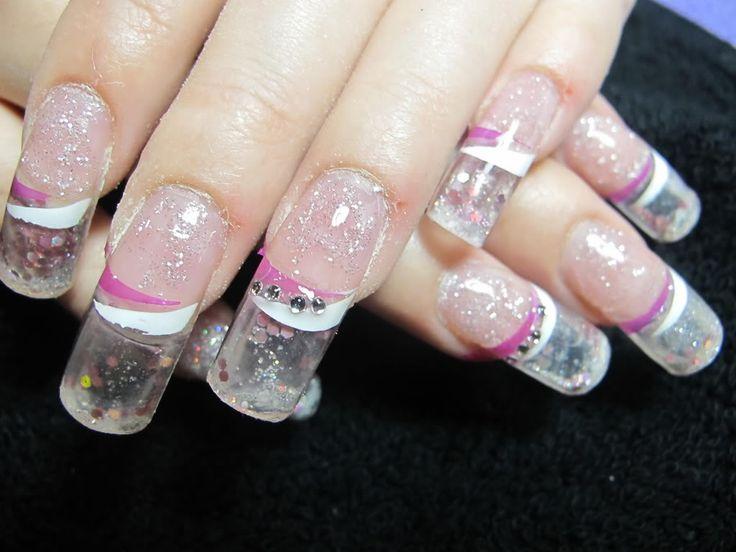
Water Bubble nails are also known as aquarium nails or snow globe nails. They are enhancement features which are added on the natural nail. The water bubble nail is unique as in this nail glitters, rhinestones and other encased nail embellishments are suspended in water and this water continuously flows through the nail. It is a unique new trend as it will make your nail look like a glittering aquarium minus the fishes!
In this article we will know how to make water bubble nails.
You'll need:
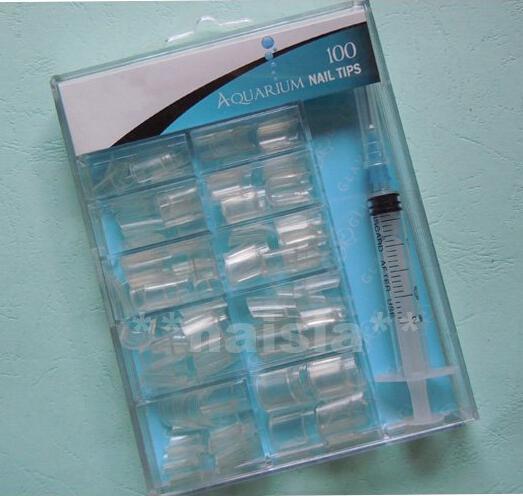
- Aqua Nail Kit
- Acrylic gel
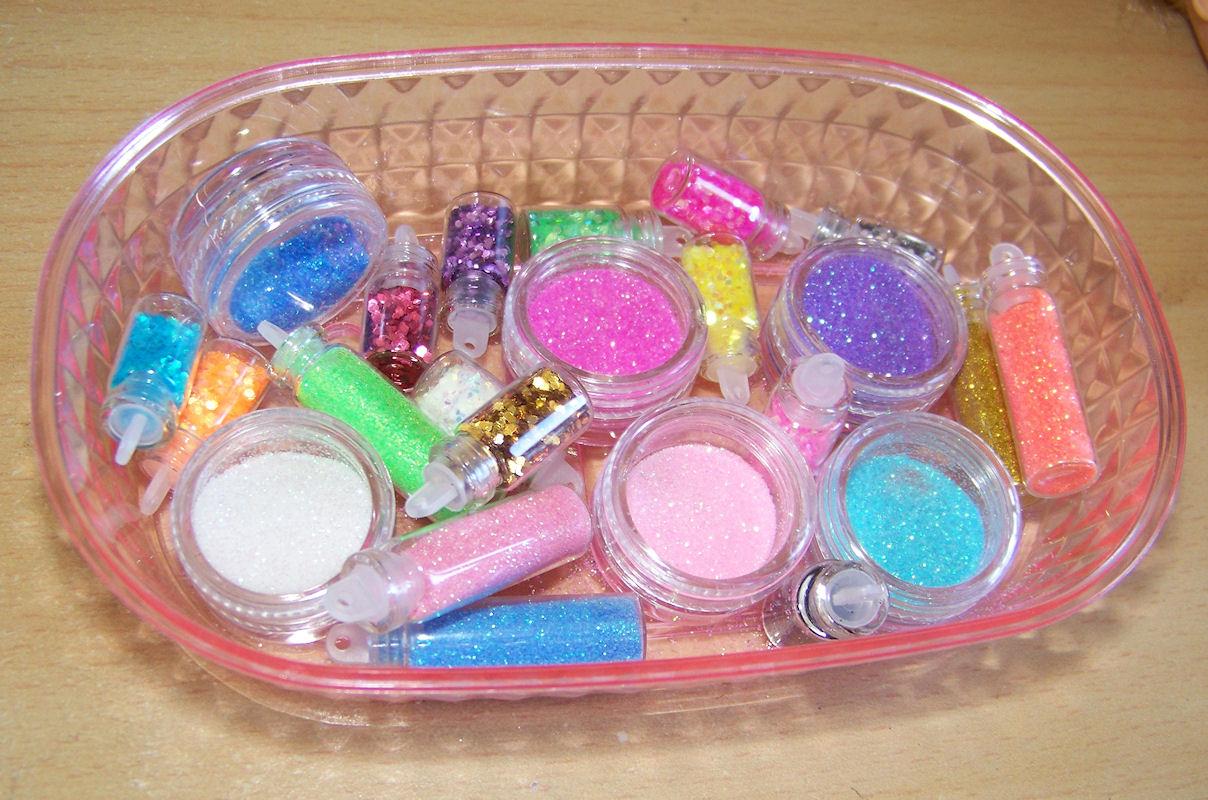
- Sequins, glitter and other nail art embellishments
- Tweezers
Steps to follow:
The first step is to decide on a proper tip size. Choose the size of nail tip with which you are comfortable with. You'll be able to buy an Aqua Nail kit online or at specialized shops. These come with several-sized nails and a syringe.
Choosing the right size is crucial for a natural look and comfortable wear. Ensure the tips complement your nail shape.

After choosing the desired nail tip size connect the half-well tip and the full-well tip. To connect both the tips, apply clear acrylic in the small well. Then with gentle hands lay it down on the top of the full well tip. Leave it some time to dry. Then seal its side with clear acrylic and let it dry again. Take care to leave the top open (that is the part that will be nearest to the cuticle).
Ensuring a secure connection here is essential to prevent any leakage of the water and embellishments later on.
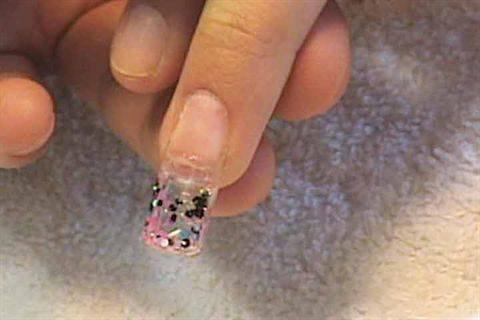
Now take the open tip and put embellishments in it. Choose embellishments of opposing colors as they look more beautiful. Use an open nail, tweezers or the syringe (depending on the embellishment's consistency) to fill the nail. While filling, make sure that you fill it not more than halfway through.
Seal the open silt of the nail with acrylic.
Consider using embellishments such as tiny charms, small beads, or even miniature confetti for added flair.

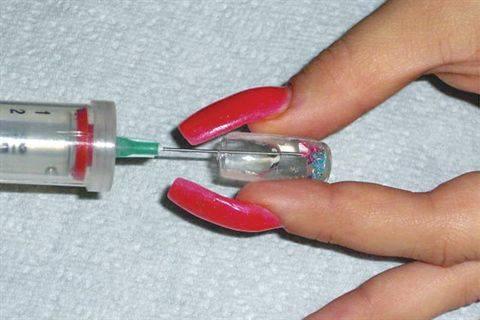
Now take a small syringe which you'll find in the pack and fill it with distilled water. Insert the needle of the syringe far inside the tip opening and slowly push the plunger so that the tip begins to be filled with water. When the tip is completely filled with water, seal it with clear acrylic. Then let it dry. When the acrylic dries, file it to make the tip smooth.
It's important to use distilled water to avoid impurities that could cloud the appearance of your nails over time.

Now that the nail tips are done, the only work that remains is to stick it on our nails. You can do it directly. But it is at first advised to glue some thin sequins on the outer edge of your natural nail. By doing this, when your natural nail starts to grow it will look normal. But without the sequins anyone can make out that your natural nails are growing, which doesn’t look so good.
Additionally, using sequins can add an extra layer of sparkle to your overall design, making the transition from natural to artificial nails seamless and visually appealing.
So, finally after gluing on the sequins apply the aquarium nails on your natural nails. You can use clear or colored acrylic to seal the water bubble nails on the natural nails. For a final touch apply clear nail polish on the water bubble nail.
Make sure the polish is applied evenly to give a glossy finish and protect the design beneath.

If you want to read similar articles to How to make Water Bubble or Aquarium Nails, we recommend you visit our Beauty & Personal Care category.


