How To Do Ombre Nails With A Sponge


If you want to keep up with the latest nail art and stand out with original and spectacular nail decoration, do not miss the following OneHowTo article. We bring you a simple technique showing you how to do ombre nail with different colors. The end result is impeccable. Follow the step by step guide and prepare to show off your well-groomed hands with a creative and fabulous design.
You'll need:
- Gloss polish or hardener
- Tape
- Nail polish
- Sponge
- Bowl
- Scissors
Steps to follow:
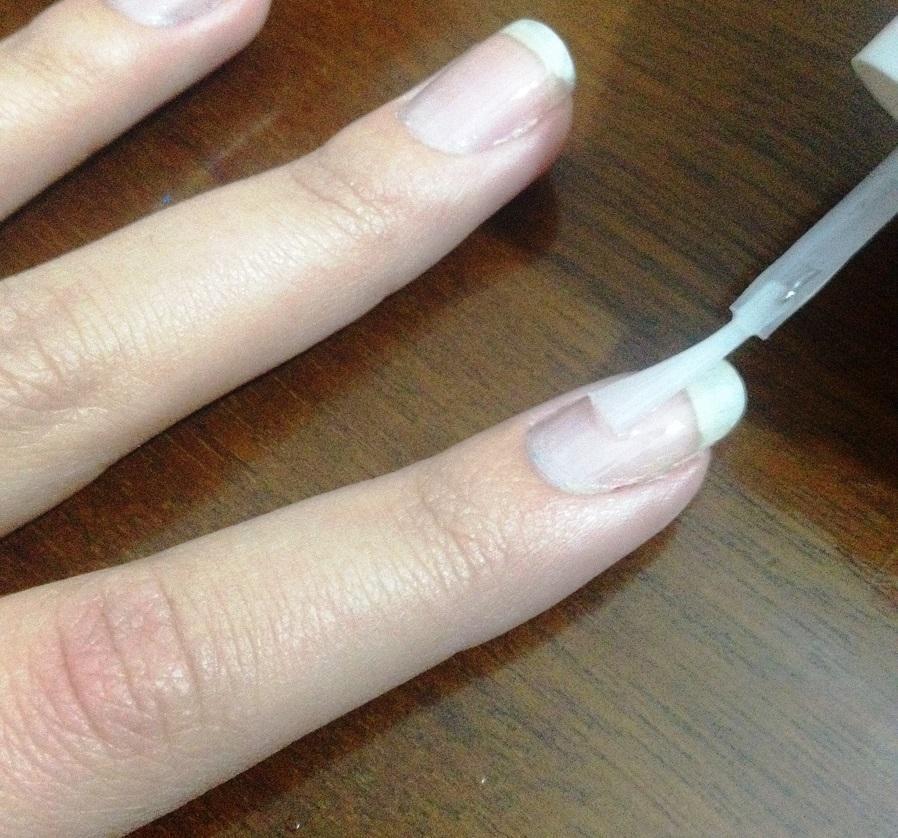
Before starting on your ombre design, apply a layer of gloss or hardener to your nails. This step is key to protecting your nails and getting the final design to remain intact for longer.

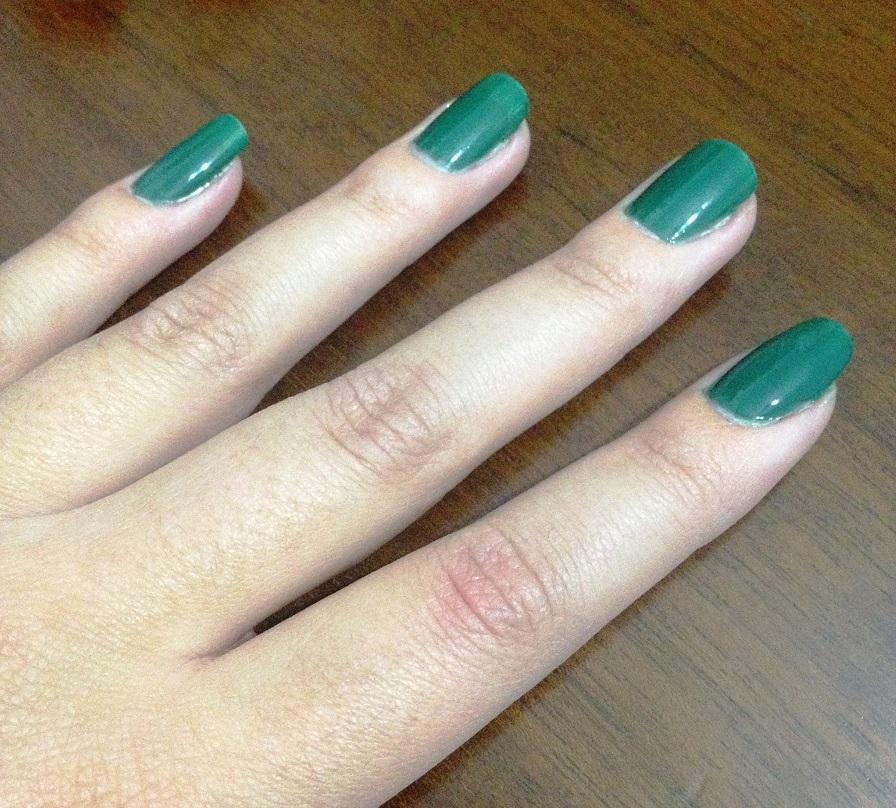
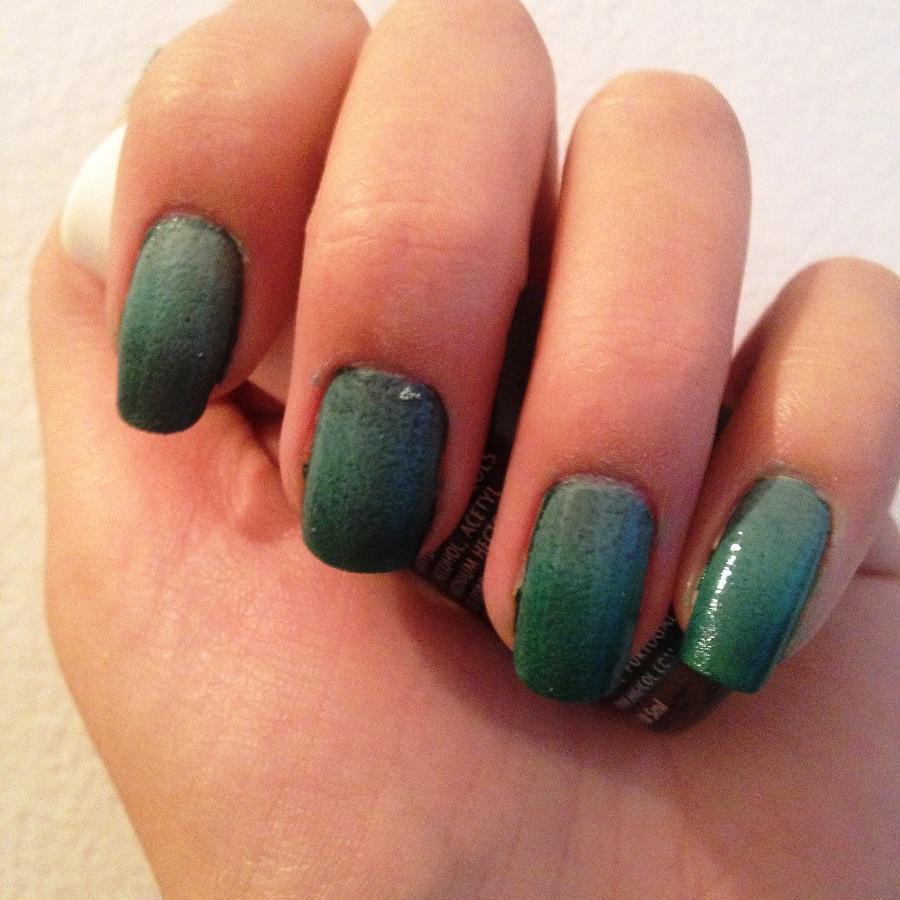
Now, it's time to choose shades of nail polish that you like to create the ombre effect. Ideally, choose two or three shades of the same color range so that they match well, but you can try completely different colors too. We have chosen three shades of green. Once you've decided on the colors, apply the darker shade as the base color so that the final effect stands out well.

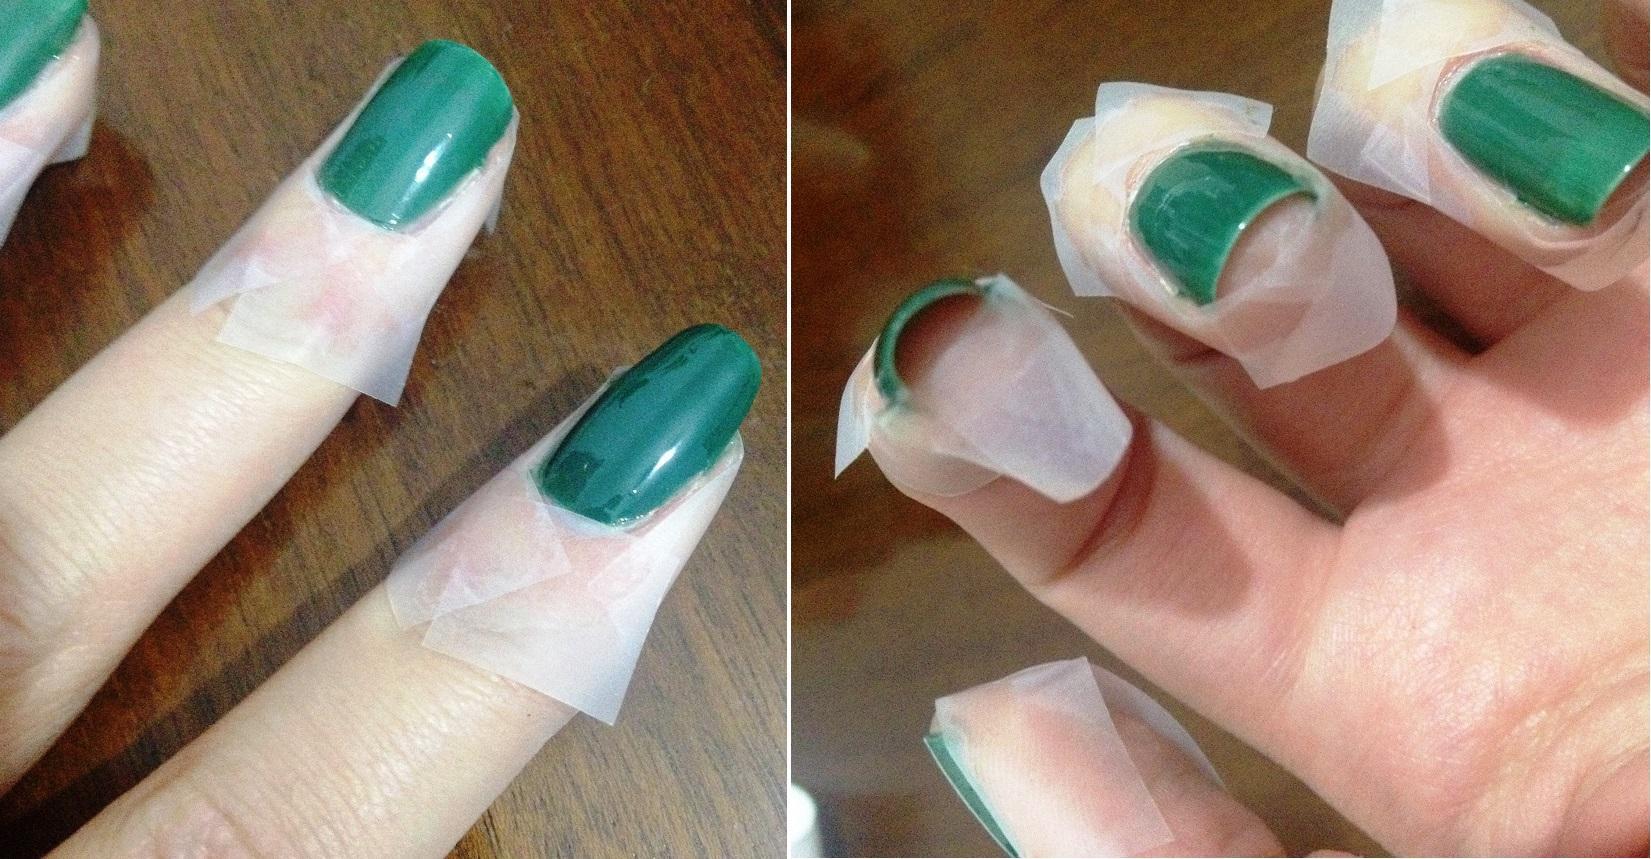
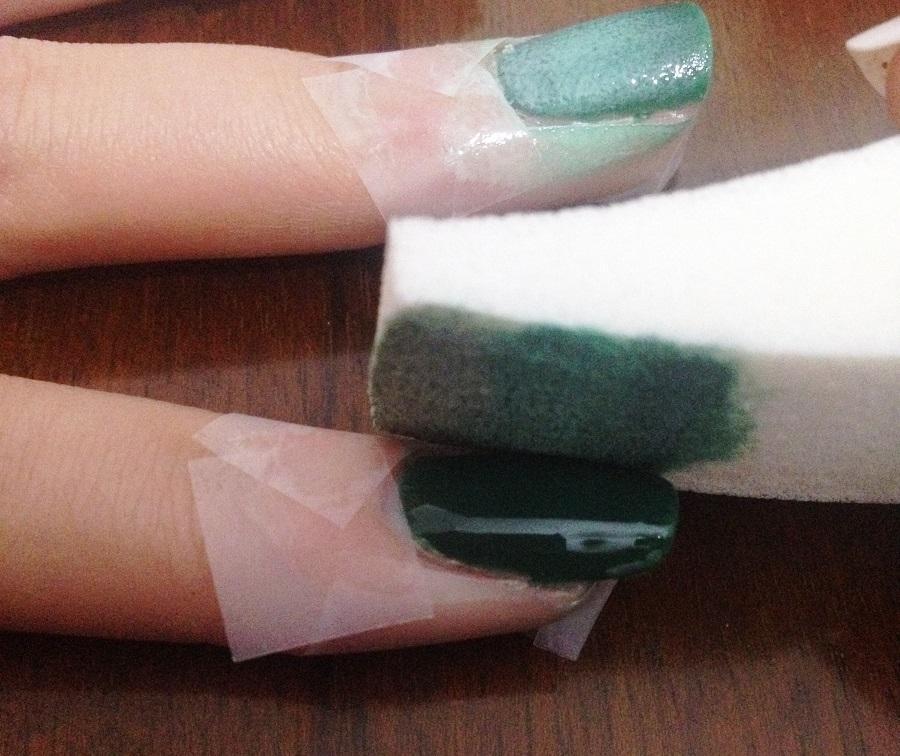
A useful trick to prevent staining your fingers while doing the ombre is to place strips of tape around your nails. Look at the images to find out exactly which areas you should cover.

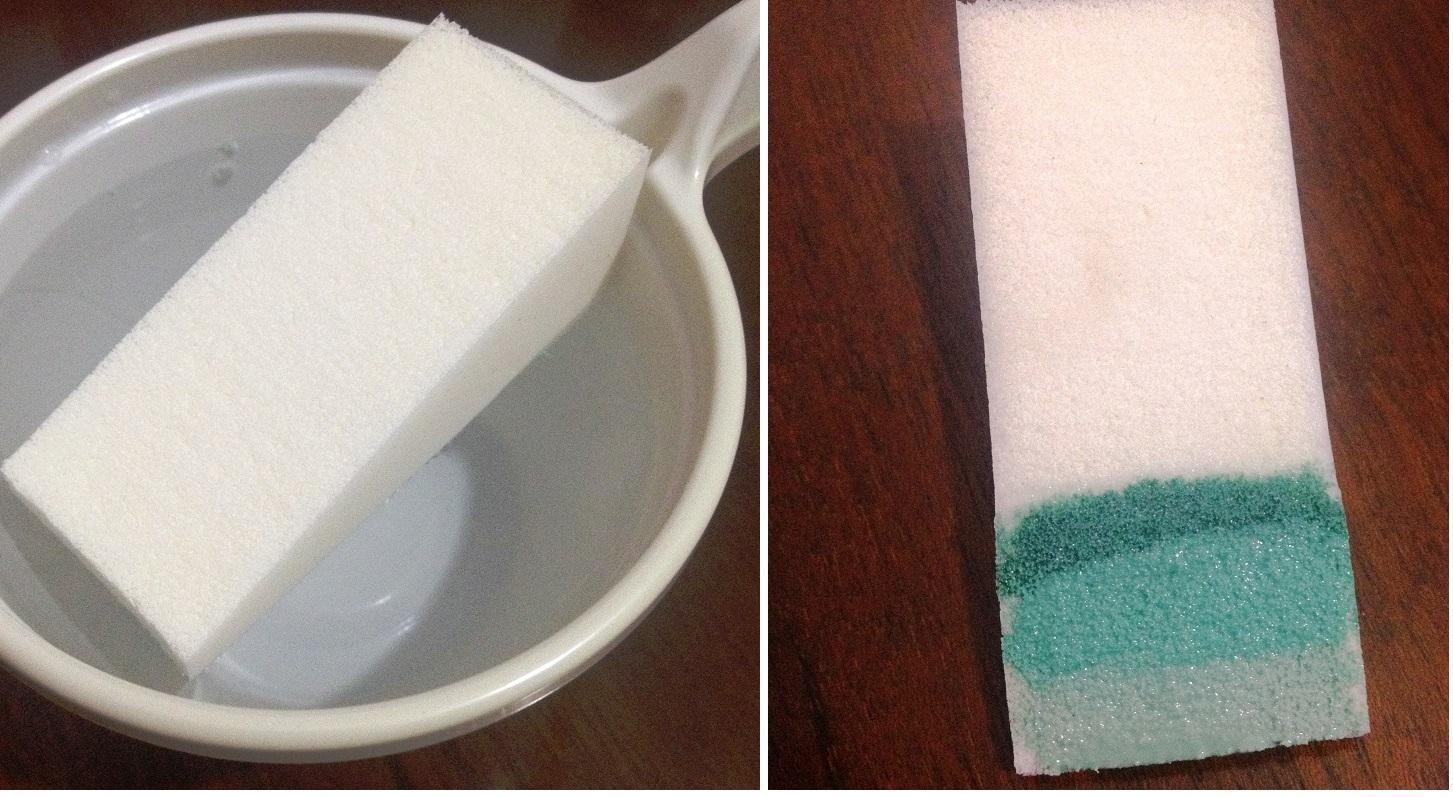
Grab a make-up sponge and fill a bowl with a little water. Place the sponge in the bowl and squeeze it to remove excess water. The key is that the sponge is moist and not wet. Now, on the sponge, draw a horizontal stroke in each of your chosen nail polishes.

For the ombre to stand out on your nails, move the sponge from right to left or vice versa, lightly dabbing it. If you want to give more intensity to the colours, try dabbing the sponge on your nails again, making sure you are using the same amount of paint for each section.

Finally, when it has dried, apply a light coat of gloss or hardener to seal the design and give a smooth texture. And you're ready! In a few minutes you will have beautiful and original ombre nails. Be bold and try the design with different colors.
If you love nail art, at OneHowTo be sure to take a look at this other nail art tutorial: Aquarium nails.

If you want to read similar articles to How To Do Ombre Nails With A Sponge, we recommend you visit our Beauty & Personal Care category.


