The Difference Between Gel and Acrylic Nails


The main difference between acrylic and gel nails is the polymerization process, the final thickness and the way to remove the polish once the desired time has elapsed. Whether gel nails or acrylic are better for you, will depend on personal preference. Choosing the right nail for you means getting the style you want, but being informed about the different types of nail applications will help you to make your decision.
Both techniques work with extensions that are placed on natural nails. These provide a uniform finish and lengthen your nail. The basic difference lies in aspects such as the material used, the application, the duration, the thickness and, of course, the final result. oneHOWTO helps you decide by explaining the difference between gel and acrylic nails.
What are acrylic nails?
We starting by looking at acrylic nails. These are a very popular technique used in nail salons. Your natural nail might not be in the best shape, so these are extensions which can provide the right look, regardless. The material used for its construction is rigid and less natural than what can be achieved with a gel nail. Thanks to this type of manicure you can create, explore and exploit more risky designs in nail art.
In addition, these types of false nails dry in the air and must be mixed with a liquid called monomer. Doing so makes the acrylic more resistant due to the amount of chemicals it contains. This is also why it also gives a stronger odor during application. The result is XL nails which are more resistant and durable.
How to apply acrylic nails
Materials and tools:
- Acrylic nail powder
- Acrylic liquid monomer
- Nail primer
- Nail tips
- Nail glue
- Acrylic brush
- Dappen dish (for the liquid monomer)
- Nail file and buffer
- Cuticle pusher
- Paper towels
Preparation:
- Begin by cleaning and sanitizing your hands.
- Push back the cuticles and shape the natural nails with a nail file.
- Select the appropriate nail tips based on the desired length and shape.
Applying nail tips:
- Apply a small amount of nail glue to the back of a nail tip.
- Press the tip onto the natural nail, ensuring a snug fit.
- Trim and shape the tips to the desired length.
Acrylic application:
- Pour a small amount of acrylic liquid monomer into a dappen dish.
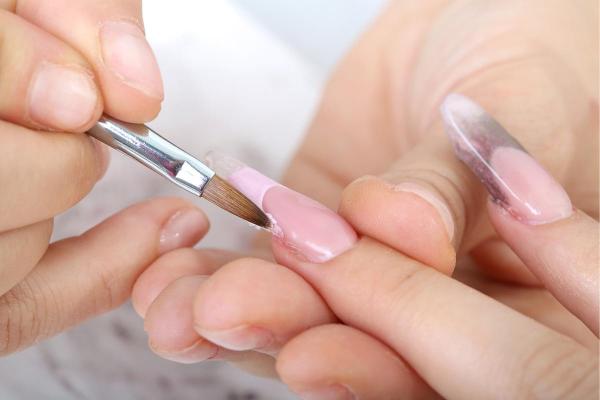
- Dip the acrylic brush into the liquid, then into the acrylic powder, creating a small acrylic bead.
- Place the bead on the nail near the cuticle and use the brush to shape and spread the acrylic over the nail surface. Work quickly but precisely.
- Repeat the process for each nail.
Smoothing and shaping:
- Once the acrylic has dried and hardened, use a nail file to shape the nails to the desired length and shape.
- Smooth the surface with a buffer to remove any roughness.
Finishing touches:
- Wipe off any excess dust with a clean, dry brush or a lint-free cloth.
- Apply a nail primer to promote adhesion and longevity.
Polishing (optional):
- Finish the acrylic nails with nail polish, gel polish or leave them natural based on your preference.
Always follow proper safety and hygiene practices. Consider seeking professional training before attempting to apply acrylic nail extensions, especially if you're new to the process.
If you want to change, you may want to know how to remove acrylic nails at home so you can do a different application.
What are gel nails?
Now it's the turn of gel nails. This technique is also used with the aim of lengthening the natural nail, while strengthening it and improving its appearance. For this gel nail application to work, special polishes are used that are applied naturally. They are then dried through an ultraviolet light lamp.
Compared to acrylic nails, the result is a more natural manicure, because the materials that make up this technique give more flexibility to the nails compared to acrylics, so the result is considered to be more natural and beautiful.
How to apply gel nails
Materials and tools:
- Gel nail extensions kit: this typically includes clear or colored gel, nail forms, a UV/LED lamp and other necessary accessories.
- Nail prep tools: cuticle pusher, nail file, buffer, and alcohol wipes.
- UV/LED lamp: to cure and harden the gel.
Preparation:
- Start by cleaning and sanitizing the natural nails.
- Push back the cuticles using a cuticle pusher.
- Shape the nails with a nail file.
Apply nail forms:
- Select the appropriate nail form for each finger.
- Attach the nail form to the natural nail, creating the desired nail shape.
Apply bonding agent:
- Apply a bonding agent or primer to the natural nails to promote adhesion.
Apply base gel:
- Apply a thin layer of base gel over the entire nail surface. Ensure it's evenly distributed.
Cure under UV/LED lamp:
- Cure the base gel layer under the UV/LED lamp according to the manufacturer's instructions.
Apply gel extensions:
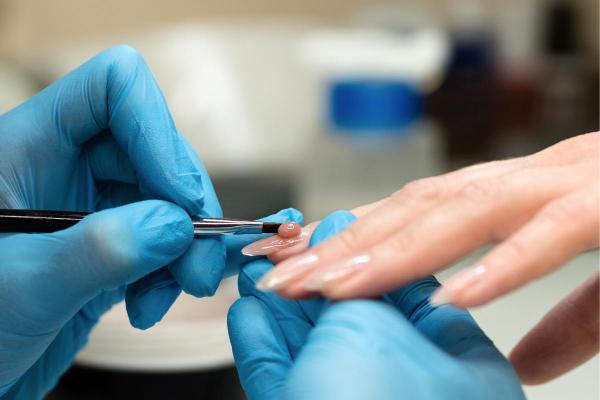
- Take a small bead of gel and place it at the tip of the nail form.
- Use a gel brush to shape and spread the gel over the form, creating the desired extension.
- Cure the gel under the lamp.
Repeat and build thickness:
- Repeat the process, applying additional layers of gel to build thickness and strength.
- Cure each layer under the lamp.
Shape and buff:
- Once the desired thickness is achieved, shape the extensions using a nail file.
- Use a buffer to smooth the surface.
Apply top coat:
- Apply a top coat of gel to add shine and protect the extensions.
- Cure the top coat under the lamp.
Clean and finish:
- Wipe the nails with alcohol wipes to remove any residue.
- Apply cuticle oil to moisturize the cuticles.

Differences between gel acrylic and nails
The main difference between acrylic and gel nails is the polymerization process, the final thickness and the way to remove the polish once the desired time has elapsed. In this way, using gel nails you achieve a more natural and shiny result, but they last less time and tend to be a more fragile manicure than acrylic ones. In addition, gel nails are achieved thanks to the fixation of ultraviolet light.
If we focus on acrylic nails, the biggest difference they have compared to gel nails is that they allow you to show off longer lengths than your natural nails and more risky designs. This is because they are built thanks to the mixture of liquid and powder. In addition, they last longer than gel nails and are easier to repair and remove.
Acrylic nails are more artificial and false. They may even have a noticeable odor due to the use of chemicals in the manufacturing process. This does not happen with gel nails, since they are odorless. Finally, acrylic nails have a more laborious process than gel nails, so more time is invested.
In summary, gel nails are a polish on the natural nail, while with acrylic you can make extensions on the nail. Acrylic nails give greater length, they are harder, but they damage the natural nail, since both in the application and in removal uses a more abrasive process.
Is acrylic or gel better for doing nails?
The answer lies in the tastes of each person in choosing acrylic or gel nails. Both techniques have different characteristics, processes and results. While gel nails provide a brighter and more natural look, acrylic makes our nails more resistant and long-lasting.
Since the process of making acrylic nails uses liquid and powder and, therefore, more chemical elements, they can be more harmful to the health of your nails in the long term. In this sense, we must take into account the polymerization process that is carried out when the acrylic is applied and the way to remove it when the process has been completed, since in some cases it can be more abrasive.
Now you know what type of nail you want to choose, you might need some help selecting a color. We're here to help with our articles on trending fall nail colors and trending winter nails colors, depending on the time of year.
If you want to read similar articles to The Difference Between Gel and Acrylic Nails, we recommend you visit our Beauty & Personal Care category.
